FINAL SHOOT
For the final shoot I wanted to use coloured backdrops instead of keeping it simple due to the previous shoot. Our group was just playing around with prop, such as phones, using chairs and scarves. We also tried different techniques such as using Vaseline around the lens to see what it would look like. I personally didn’t like the outcome I felt it was too blurry. (I have inserted the example below).
However, I discovered that using the coloured gel in front of the lens, created a really interesting image, and therefore, I used these for my final pieces.
Final Chosen Images
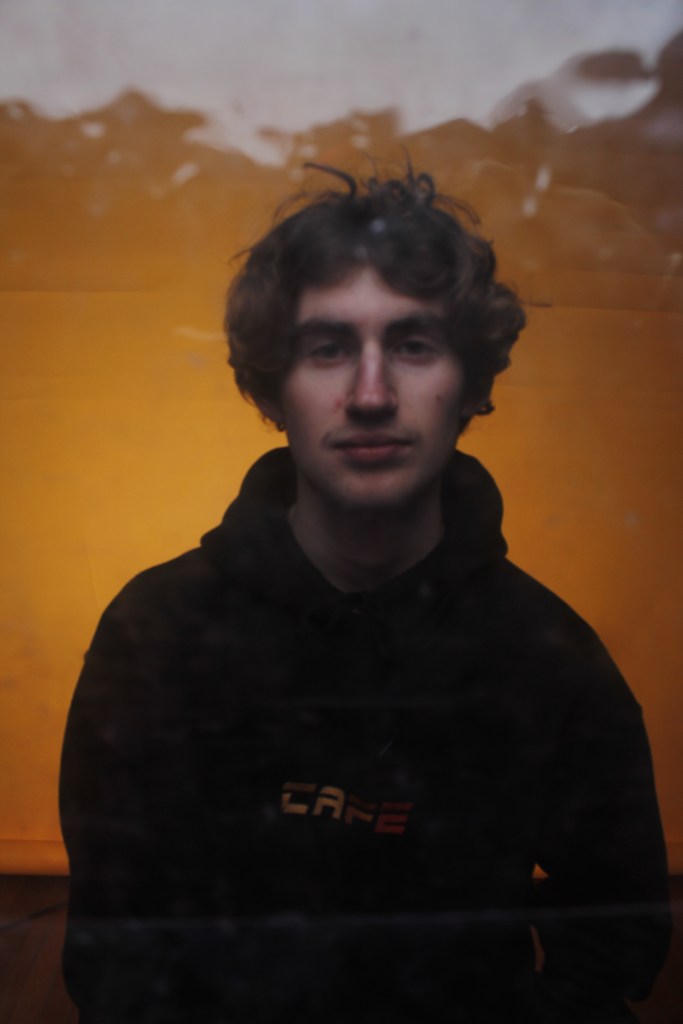
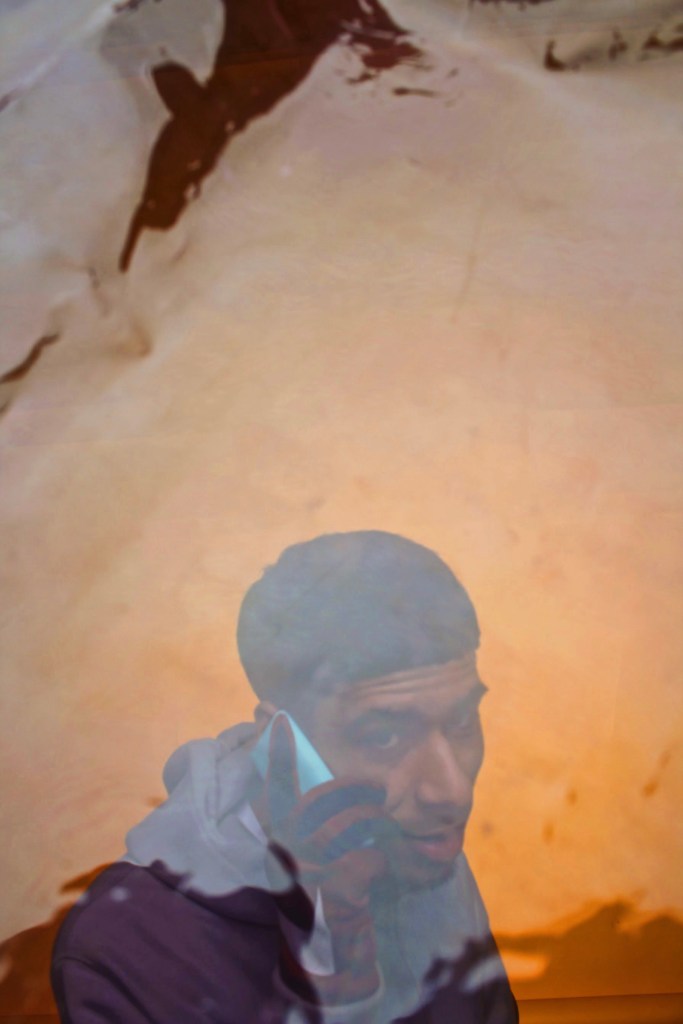
- (Arran) The concept for this first image was actually the models Arran’s idea to use his phone ( a brick phone) as normally majority of people use iPhone’s other Androids and thought it would be cool and eccentric to use. Plus, using the glove was a nice fashion statement which is very on trend too. In terms of colour I thought blue contrasted with orange/ yellow coloured lenses went well together. We used one main spotlight towards the background and one group member held the gel in front of me/ lens. The final product is below I was very happy with this image and almost looked like it had been photoshopped but it was actually shot like that.
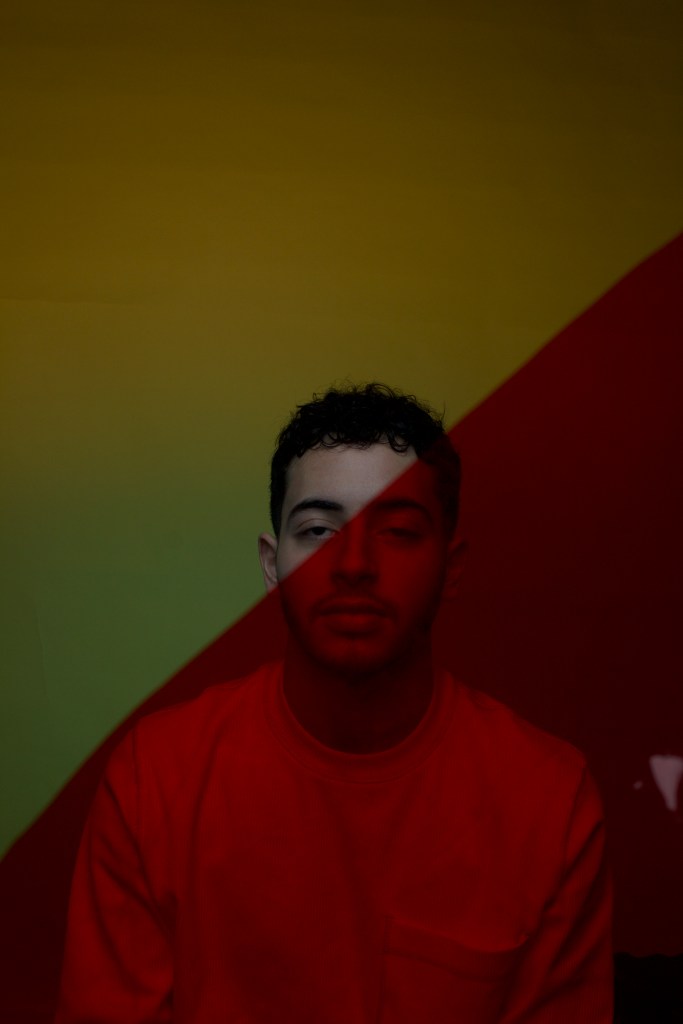
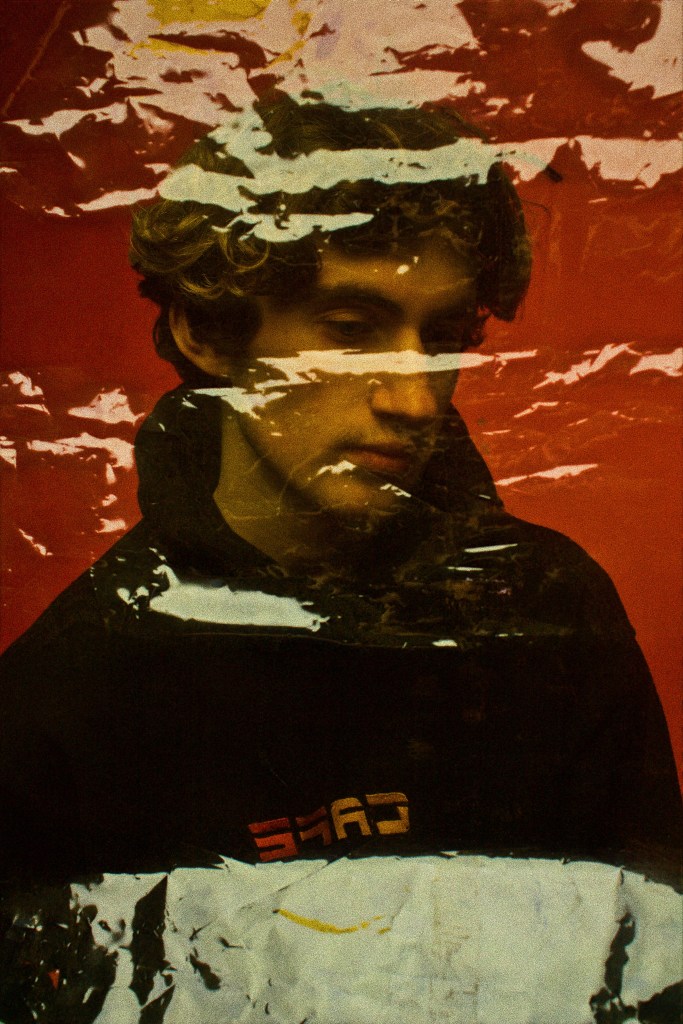
2). (BEN) The concept for this one was again using the coloured gel but this time I wanted the red background to stand out and contrast with the models hoodie. And in order to do this we decided to use a lighter coloured gel( we used yellow) so we could get the effect of the plastic coloured gel but also really see the red background. For this image I did edit this on photoshop, what I did was brighten the exposure by 3 and added an effect called grain so it could look like it was taken on film. This is probably my favourite image out of them all.
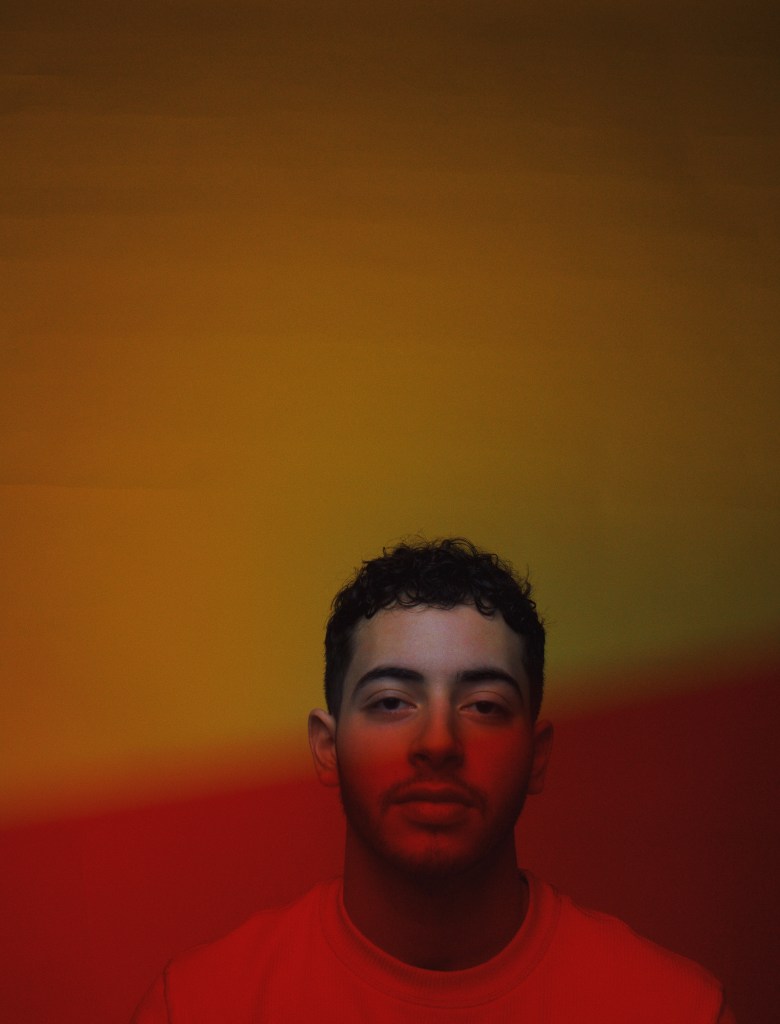
3). (Ismail) For this image, I still wanted it to connect with the other two images, so I decided to still use a coloured background and a coloured gel, but I wanted to be less focused on the effect and found that using the edge of the gel gave a cool effect. To improve this I would like to find a back drop that was less creased also maybe change the angle of the model and maybe bring him closer. However, because of the few sessions we had I felt these images I created were the best ones I shot.
PICS I DIDNT LIKE AND WHY